Thursday, April 30, 2009

Tamatar chop (Mashed potatoes - Indian style)

Great taste, flavor, and aroma using some of the bare minimum ingredients of Indian cuisine- that's our recipe for today. Tamatar chop with a soft cotton like texture undoubtedly melts in the mouth. Green chili gives it that extra kick just to awaken your taste buds while richness of ghee caresses your senses to add that homely touch which any palate would crave for.

Ingredients:
1. Ghee (Clarified unsalted Butter)
2. Tomato
2. Potato, boiled, peeled, and mashed.
3. Green chili, chopped
4. Salt to taste
5. Red chili powder
6. Pinch of turmeric powder

Instructions:
1. Heat ghee in a pan.
2. Add the mashed potatoes and cooked until they start to stick to the base.
3. Add turmeric, red chili powder.
4. Add tomato and cover for about 20 minutes or until the tomatoes blend in with the potato.
5. Add salt to taste.
6. Sprinkle green chili.

Voila! Experience your very own passage to India, sitting at home!

Saturday, April 25, 2009

Garnishing tip: Rose stunner

Welcome back to Food Fanatic's week seven of Garnishing tips and techniques. I hope you all are enjoying the weather outside. My local readers must be delighted today to see the sun shining bright and steady. Summer (in North America) is especially fun because it means hanging out around the beach side, pool parties and barbecues, Starbucks smoothies near the serene shore, celebration of lights with firecrackers, long hikes in the company of good friends, freedom from blazers and jackets, flip flops in full throttle, manicures-pedicure and pampering galore, picnics, volleyball, gelato, and patio eat outs!

As summer stretches its arms in lush beauty with myriad colors and while the gardens burst with flowers of all types, it's time to perk up your cooked dishes too! Freshen up the mud brown spicy curry with a splash of color in the form of bright red roses made from tomato peel. Alternatively, consider using cucumber slices to create a flowery edible garnish that can prettify any dish. Use strawberries or radish to decorate desserts, juices, and snacks.
Cucumber Image courtesy: Google search
Padma Rekha from Plantian Leaf stunned me with her rose glory garnish. This edible bloom can adorn any dish and floor for weeks. And the best part is that making this rose flower is simple. All you need is a sharp knife and ripe tomato. Peel it starting from the base such that a strip of the skins gets peeled off in a circular fashion. Roll up this strip then form a rose like appearance. Add a few fresh leaves of mint on the sides to give it a real life like appearance. Thanks, Padma for this great tip! I love it!


TADA...


Watch out for Food Fanatic's last post
on garnishing next week. Next week's post will feature one fellow food blog buddy's cake decoration technique. Stay tuned!
Garnishing tips and techniques archive:
Unconventional wonders: use a stencil
Marvel with vegetables: carve carrots
Simplicity sensation: garnish with edibles
Contrasting charisma: Garnishing by adding a riot of colors to the dish
Fascinate with fruits: Strategic shaping of fruits as garnishes
The traditional trick: Sprinkle coriander leaves and place onion rings
The balancing act: Flavor and visual appeal

Tuesday, April 21, 2009

Home Style Chicken curry and appreciation

This dish is one lip smacking number that keeps you asking for more!
The aromatic flavour of herbs mesmerizes while the chicken curry masala is a delight to the senses. The paste of tomato adds a kick on the tangy side while the goodness of turmeric unrelentingly acts as a purifier. The tempering with oil in mustard seeds completes the taste of the dish by adding just the right pungent flavour making it an Indian classic.

P.S. This is my friend's recipe. I only helped but I was given the permission to post this on my blog :)


Ingredients:
1. Boneless chicken pieces
2. Salt to taste
3. Chicken curry powder
4. Turmeric powder
5. Red chili powder
6. Olive oil
7. Mustard seeds
8. Cumin seeds
9. Garlic, minced
10.Ginger, minced
11. Onions, chopped
12. Tomato paste
13. Coriander leaves, chopped.

Instructions:
1. Wash and cut into bite sized pieces.
2. Add chicken curry masala, red chili powder and marinate for about 15-30 mins.
3. Heat oil in a pan then add mustard seeds.
4. When they splutter, add cumin seeds, garlic, ginger, onion. Sautee.
5. Add tomato paste and cook until it leaves the oil.
6. Add chicken and mix well.
7. Add salt and cover. Cook until a knife can pierce through it and come out clean.
8. Add chopped coriander leaves.

Serve with Parantha or rice.

One reader was generous enough to leave the following kind words about my blog:
"Man!!! this is a wicked link . . .Congratulations! This is one excellent blog!!! I feel proud to know you! How did you learn so much about cooking? You also write so humbly. Swami Nityananda says that included in the ingredients of the food one eats is the thoughts of the cook whilst cooking it - in this case I can feel the sincere sharing in your writing so I know that when I try your recipies, even though I am just learning to cook, the dish will be overflowing with goodness :-)"

THANK YOU! I am humbled all the more!

Monday, April 20, 2009

Counting calories? Fear no more! Moongh Salad/ Green Bean Sprouts to the rescue...

So I am living by my healthy living, healthy eating pledge. I did a 10k walk in the rain yesterday and going to the gym on a regular basis. I have cut down on sugar and carbs and focus on including protein in my diet. One ubiquitous meal option for a nutritious fat free diet is salad. Salad can be of various types and I've previously experimented with making veggie salad with home-made salad dressing. This time I had some green beans (hari moongh) sitting in the pantry, that kept staring at me, hoping to devoured. This situation seemed to work quite well with my latest health obsession. So I did give in to the desperate plea of the moongh in my pantry. Here is how I went about having mercy on my hari moongh who so wanted to make it to my digestive tract.

Needs preparation. Serves 4-6.

1. Green lentils soaked for 2 nights
2. Red onion, chopped
3. Ripe tomato, chopped
4. Coriander leaves, chopped (optional)
5. lemon juice, drizzled
6. Salt to taste
7. Chaat masala
8. Red chili powder
9. Green chili, chopped (optional)
10. Chopped cucumber
11. Black pepper, freshly ground, to taste.

Fast facts:Moongh is native to India and when soaked for 2 days, turns into sprouts. Sprouts is also common to Chinese, Japanese, Korean, and Vietnamese cooking. Belonging to the legume family, moongh is low calorie, high protien diet.
Tip: If you want more flavour to this salad try tempering salad with olive oil and cumin seeds (jeerey ka tadka). Alternatively, you can boil moongh in a pressure cooker with all the ingredients. But according to me, moongh is likely to be more healthy uncooked.

Toss everything together and serve cold. Breakfast, lunch, or snack? Healthy eating encore!

Sunday, April 19, 2009

Garnishing tip and techniques on food: The balancing act

A balance of flavour, appearance, aroma, texture, and colour is what creates a magical dish. Although we have emphasized the importance of the visual appearance of a dish, we must ensure that we don't overpower the taste of the dish. The garnish should decorate the dish, not adulterate it, overload it, or even push it into the background. Less is often more and balance is often virtue. Garnishes should be such that they complement the flavour of the dish or can be taken out before being consumed. Generally, a slice of orange perched on the rim of the glass, a wedge of lime, maraschino cherry, or a sprig of mint is all you need. But remember that cosmetics got to be in sync with flavour.

According to Emily, garnishes can, occasionally, be done very well, but only if they serve a purpose and in right amounts. Garnishes must only add something to a dish and not take away. Emily similar to Kalva uses ingredients of the dish for the garnish as well. This styles creates a balance such that the flavour of the dish is preserved while adding to the look of the dish. Also, Emily's lentil dish clearly indicates that a color balance is also something to keep in mind. Here, she uses white sour cream on top of brown lentil soup, red veggies on top of white sour cream, and green coriander leaf on top of red veggies! What a lovely combination of colorful garnishes is this without taking away from the look of the main dish!

Some garnishing do's and don'ts to alleviate this idea are as follows:
  • Pick shiny and clean garnishing fruits or vegetables to add a little extra to shine
  • Drizzled them with a little lemon juice then dipped in sugar.
  • Fruit can also be dusted with confectioners' sugar for an attractive finish. Try this with cherry on a dessert!
  • Avoid vegetables or fruits that discolor quickly. For example, slices of apple and pear are not very suitable for garnishing because they turn brown quickly. If you still want to use them just drizzle them with lemon juice to delay discoloration.
To garnish is to decorate, adorn, dress up, pretty up, embellish, prettify, spice up. The act of garnishing can be as simple as the careful placement of a few lettuce leaves on a plate, or as elaborate as a pâtè bust with facial features carved from a variety of veggies and fruits. At Food Fanatic, we discover garnishing styles and tricks on a weekly basis. Give your imagination and creativity free reign when you get to the final step of garnishing and read Food Fanatic's weekly series on Garnishing tips and techniques for food.

Garnishing tip and techniques archive:
Unconventional wonders: use a stencil
Marvel with vegetables: carve carrots
Simplicity sensation: garnish with edibles
Contrasting charisma: Garnishing by adding a riot of colors to the dish
Fascinate with fruits: Strategic shaping of fruits as garnishes
The traditional trick: Sprinkle coriander leaves and place onion rings

Saturday, April 18, 2009

Idli (South Indian Rice puffs) and New Banner and AWARD!!

Idli is a South Indian rice cake or puff that can be eaten for breakfast, lunch, or dinner. The cakes are usually two to three inches in diameter and are made by steaming a batter of rice and lentil.The fermentation process breaks down the starches so that they are more readily metabolized by the body. When cooked right, idli is a soft, fluffy, mellow disc with a texture that melts in your mouth. When eaten with Chutney and sambhar, the combination creates a riot of flavours scoring high in the taste department.

Needs preparation. Serves 4-6

Ingredients:
1. Rice
2. Urad dahl (white lentil)
3. Salt to taste

Instructions:
1. Soak rice and urad dal separately in water for 2-3 hours.
2. First grind the urad dal to smooth paste. Remember that smoother the better.
3. Then grind rice to a coarse paste.
4. Mix them together adding required salt to slightly thick paste.
5. Allow to ferment overnight.
6.Pour a ladle of batter into idli maker and steam cook in medium flame for 15-20 minutes till they are done.
7. Let cool for few minutes before you take them out.

Serve with Chutney and or Sambhar - A true South Indian delight!
Tips: To make life easier, use Rice flour that is easily available in the market instead of grinding rice. Before pouring a ladle in the grooves, 0il the grooves of the rice cooker pans to avoid the idlis from sticking. Use a knife to take out the idlis from the grooves.

Announcements:
New Food Fanatic banner: My friend M created a slick banner for my blog that I totally fell in love with. Thanks, M! A stylish banner was something I always wanted for my blog and probably didn't have the skills to create although I tried a few times. Fellow foodies, do leave your comments on Food Fanatic's new banner.
Award: Madhumati of Madhu's Food Journal honoured me with a 'I love your blog' award. This is a great moment for myself because Madhu's food blog is something for which I hold special fondness. Thanks, Madhu for this award!

Friday, April 17, 2009

Zucchini with Garbanzo beans

Zucchini is one vegetable I am trying to learn more about. Recently, my mom showed me how to make Zucchini with garbanzo beans. The earthy and rustic flavor of garbanzo beans added just the right crunch to the soft mellow taste of Zucchini. The savory flavor of mustard and cumin seeds jazzed up the blandness of Zucchini while pungent smell of tamarind made this dish a die for. This dish does not have an overdoes the spices. Rather, using a few ingredients makes each ingredient in the dish stand out on its own to make this dish exceptionally delicious. So what are we waiting for? Let's discover this culinary treat!

Needs preparation. Serves 4-6.

Ingredients:
1. 2 fists, Garbanzo beans soaked overnight.
2. Zucchini
3. Salt
4. Canola oil
5. Turmeric powder
6. Red chili powder
7. Tamarind pulp
8. Mustard seeds
9. Cumin seeds

Instructions:
1. Peel then finely chop the Zucchini
2. In a pan, heat oil.
3. Add mustard seeds.
4. When it crackles, add cumin seeds.
5. Add turmeric powder, garbanzo beans, and Zucchini.
6. Add salt and red chili powder.
7. Cook in low heat with some water.

Serve with Indian bread.

Tuesday, April 14, 2009

Chawal ki Poori (Indian Rice bread stuffed with Yellow Split pea)

Chawal (rice) ki poori (bread) is a legacy that comes from my late grandma. It's a unique dish that is unknown to many. And it's uncommonness is what makes it special. Chawal ki poori can be understood as a sandwich wherein the outer bread layers are made of a rice dough while the inside filling is ground Yellow Split pea. It's the best of both worlds - rice and lentil - two in one! Chawal ki poori has a longer shelf life than any of the usual Indian bread varieties which makes it ideal for food on-the-go. Have it for breakfast, lunch, dinner, or as a snack - this wholesome, rich delicacy will satiate your hunger to eternity. Bon appetite!
Ingredients:
1. Blended Chane ki dahl (Split Yellow Pea)
2. Rice flour
3. Salt
4. Ginger, minced
5. Heeng

Instructions:
1. Cook rice flour in a pot with some water. When the water starts evaporating and the rice flour starts to thicken like a dough, remove from heat and cook.
2. Knead with hands to make the dough smoother.
3. Add the ground chane ki dahl with ginger, salt, and heeng. Make a dough of this.
4. Make small balls of the rice flour dough as well as the chana dahl dough.
5. Roll the balls with a rolling pin.
6. Between 2 layers of rice dough, put a later of the chana dahl dough to make a sandwich.
7. Then with a soft hand, roll the three layers on top of each other such that they stick together.
8. Cook on a pan until golden brown.

Serve hot alone, with Chutney, Raita or any vegetable such as with Bharva karela.

Monday, April 13, 2009

Upma (Delactable refined wheat grain)

Upma is a South Indian breakfast made of refined wheat grains. It is considered low calorie food so yay to healthy eating!

Serves 4-6. Needs preparation.

Ingredients:
1. 1.5 cup Sooji or refined wheat grains/ Semolina
2. 5-6 tablespoons Lemon
3. 4 tablespoons oil
4. 2 cup frozen mixed vegetables
5. 2.5 cup water
6. Salt to taste
7. 1 teaspoon mustard seeds
8. 10-15 fresh curry leaves
9. 1/2 teaspoon red chili powder
10. 1 medium sized onion, chopped

Instructions:
1. Roast the semolina in a dry pan until it turns golden brown.
2. Set aside and cool.
3. In a pan, heat oil and add mustard seeds. Allow it to splutter.
4. Fry the onions and curry leaves.
5. Add vegetables and cook for 10 mins.
6. Add salt and red chili powder.
7. Add 1 cup of boiling water to this broth. Cook for about 10 mins until the vegetables become tender.
8. Add roasted semolina and the rest of the water.
9. Add lemon juice and cook until all the water disappears.


Server hot with Chutney, Ketchup, or Raita. Devour delectable Upma!

My mom made this for my breakfast today. Love you, mom!

Sunday, April 12, 2009

Garnishing tip and techniques for food: The Traditional trick: Sprinkle coriander leaves and place onion rings

Old is gold. No matter how many new tips and tricks for garnishing we may come up with, we cannot beat the look of a dish decorated the classic style. In fact most of our new garnishing styles are based on old ones. For example, citrus has long been, and will always be, a strong foundation for garnish. Colorful, flavorful and versatile, lemons add that perfect combination of flavor, aroma and visual appeal. Traditionally, citrus has taken the form of twists, spirals, slices and wedges, and with the passage of time we continue to come up with some new ways to add panache to that citrus garnish. Some more evergreen garnishing styles include sprinkling coriander leaves and decorating the dish with onion rings. Garnishing with a herb such as coriander is a minimalistic but effective way to brighten a dish while enhancing its flavor and Shree and Madhu are fellow foodie bloggers who adhere to this style.

Traditional garnishing styles are known to have three basic three dimensions: visual, aromatic and flavor. Here are some tips on the traditional garnishing style:
  • Choose garnishes that complement food.
  • Cut garnishes into neat, evenly shaped piece or place them asymmetrically.
  • Use the garnish to draw attention to the dish not to be the center of attraction.
  • Use fresh, natural and simple garnishes.
Cheers to Post Six of Food Fanatic's Garnishing tip and techniques! Though this weekly series through we have been exploring and deploring the ideas for food decoration. The most interesting ideas are still lined up - yet to be posted. Keep reading!

Garnishing tip and techniques archive:
Unconventional wonders: use a stencil
Marvel with vegetables: carve carrots
Simplicity sensation: garnish with edibles
Contrasting charisma: Garnishing by adding a riot of colors to the dish
Fascinate with fruits: Strategic shaping of fruits as garnishes

Saturday, April 11, 2009

Eat Healthy, Live healthy: Brown rice pilaf

Some of you may remember that I undertook to eat healthy a while ago. I know, I know, I swayed. But now I am getting more serious about healthy eating and healthy living. I read health blogs, wake up early and go to the gym, and have been watching my diet. Indian cooking typically is pretty rich and it's easy to end up using high fat ingredients such as ghee (butter) to add flavour. I have been training myself to eat brown rice for an year now. I would cheat and mix brown rice with white. But I today made a major shift by preparing rice pilaf with only brown rice.

Brown rice is also known as hulled rice. It was supposedly eaten by the poor in the olden days and white rice was consumed by the elite. In the modern world, brown rice is eaten by the health conscious because it is a natural grain that remains unbleached. Although many types of brown rice contain more fat than white rice, the main differences between the two forms of rice lie in processing and nutritional content. When only the outermost layer of a grain of rice (the husk) is removed, brown rice is produced. To produce white rice, the next layers underneath the husk are removed, and white rice is produced. Several vitamins and dietary minerals are lost in this removal and the subsequent polishing process.

Brown rice needs more water and takes a longer cooking time. Some people find it difficult to eat brown rice because of the texture and taste. A colleague suggested adding olive oil and salt in the water while cooking olive oil. This was my first experiment while cooking brown rice so I was more concerned about how it turns out rather than noting the recipe. Please excuse me for that. Here are the vague memories while cooking this dish:

Ingredients:
1. Red pepper, sliced and diced
2. Fresh curry leaves
3. Red onion, chopped finely
4. Ripe tomato, chopped
5. Turmeric powder
6. Salt to taste
7. Frozen mixed vegetables
8. Mustard seeds
9. Cumin seeds
10. Ginger
11. Garlic
12. Garam masala
13. Red chili powder
14. Water
15. Olive Oil
16. Brown rice, washed and soaked for half an hour.

Instructions:
1. Heat oil in a pan.
2. Add mustard seeds. When the splutter, add cumin seeds.
3. Add garlic, ginger, onion, curry leaves. Saute.
4. Add tomato.
5. Add frozen vegetables and red pepper.
6. When al dente, add turmeric powder, garam masala, red chili powder.
7. Add water to make a spicy and flavoured vegetable broth. Add salt.
8. Add brown rice and cook until done.

Serve hot with Raita.

Sharmi and CFK
Tongue Ticklers and Red and Green

Friday, April 10, 2009

Tarot Root Pan fried (Sookhi Arbi Bhuji)

In my previous post, some of you expressed doubt over Arbi while others were brimming with ideas on how Arbi can be used to make drinks, appetizers, meals, or desserts. For myself, I am still discovering. I had then sworn to again cook this vegetable. So here I am living up to my promise. Today we try a new way of cooking Arbi. I invented this recipe. Last time I cooked Arbi slightly mashed.
Few facts about Arbi: Arbi is also known as Colacassia. Taro is native to the tropical parts of India and Malaysia.


After peeling Arbi, I made the mistake(?) of washing them. Although my intent was towards sheer cleanliness, my mom advised that raw Arbi is incredibly hard and now that it was wet, Arbi was now slippy and even more difficult to slice. I used a paper towel to dry the Arbi and then sliced it.

This time I wanted to make it crispy. Here is what I did:

Ingredients:
1. 7 large sized arbis, peeled and sliced, then washed.
3. 4 tablespoons mustard oil
4. Salt to taste. I added 1.5 teaspoon.
5. 1/2 teaspoon Red chili powder
6. 1/4 teaspoon turmeric powder
7. 1 teaspoon Amchoor (dried mango) powder
8. 1 teaspoon mustard seeds
9. 1 teaspoon cumin seeds

Instructions:
1. Bake Arbi in the oven at 425 degree C for 20 minutes.
2. Heat oil in a non stick pan.
2. Add mustard seeds, allow them to crackle.
3. Add cumin seeds and turmeric.
4. Add baked tarot roots.
5. When the tarot root look roasted, add salt.
6. When the vegetables are golden brown, add amchoor powder and red chili powder. Mix with a light hand.

Serve hot as an appetizer with tea or as a side with steamed white rice and Kadi.

Thursday, April 9, 2009

Baby corn manchurian (Baby corn fritters in sweet and sour sauce)

Chinese cooking is a balance of opposites...sweet & sour, hot & cold, plain & spicy - the principles of Taoism. India and China share a history. Out of the main types of Chinese cooking (which are Guangzhou, Sichuan, Beijing & Shanghai) Sichuan cooking is the one that is heavily influenced by Indian spices & Indian cooking techniques brought back by Buddhist traders. Manchurian is one such fusion dish that causes an eruption in the taste buds. Sweet, sour, spicy, sticky, and crunchy...Mmmm.....Baby Corn Manchurian!!
Bring it on!!

Ingredients:
1. 1 can baby corn
2. 2 tablespoons tomato sauce
3. 1.5 tablespoon ginger, miced
4. 1.5 tablespoon, garlic minced.
5. 3 tablespoons soy sauce
6. 1 tablespoon vinegar
7. 1 tablespoon cornflour
8. 3 tablespoons flour (maida)
9. Salt to taste
10. Oil
11. Red chili paste, 1/2 tablespoon

Instructions:
For the sauce:
1. Heat oil in a pan
2. Saute onions, ginger and garlic.
3. When the onions turn golden brown, add tomato sauce and cook until the sauce leaves the oil.
4. Add vinegar, red chili sauce, and soy sauce.

For the fritters:
1. In a bowl, add maida and cornflour and 2-3 tablespoons water to form a paste.
2. Add 1/2 tablespoon each of ginger and garlic.
3. Mix the baby corn in this paste and add salt.
4. Heat oil in a wok.
5. Fry to form fritters.
6. Transfer the fritters to the sauce.
7. Mix well.

Serve hot as an appetizer or as a side dish with rice.

Note: You can also make manchurian with cauliflower.

Wednesday, April 8, 2009

Chana Dahl (Yellow Split Pea)

I seem to be on an endless quest for good-tasting food that won't play havoc with my weight. What I keep looking for is food low in saturated fat, without any transfats, and packed with nutritious elements. With a mild sweet flavor and a texture that doesn't get mushy, chana dahl is high in proteins. Chana Dahl is made with the goodness of turmeric and the tangy flavour of tamarind pulp flirts with your sense to create an emotional response that is both capitvating and romantic. Chana dahl can be pureed for soups, or used for loaves and patties, hummus/ bean dip, and salads or casseroles. It cooks fast and does not require long pre-soaking.

Ingredients:
1. 1 cup Chana Dahl
2. 31/2 cup water
3. 1/4 teaspoon turmeric powder
4. Salt to taste
5. 1 teaspoon mustard seeds
6. 1 teaspoon cumin seeds
7. 2 inch bark of cinnamon
8. 1 bay leaf
9. 1 dried red chili, whole
10. Black cardamom, 1
11. Tamarind pulp
12. 2 tablespoons oil
13. 1/2 teaspoon red chili powder


Instructions:
1. Boil chana dahl with turmeric powder and salt in a pressure cooker. Let 3 whistles to blow. Remove from heat.
2. When the lid of the pressure cooker automatically opens, mash the dahl slightly and boil with an open lid on medium heat for 10 mins.
3. In a seperate pan, heat oil.
4. Add mustard seeds and let splutter.
5. Add cumin seeds, cinnamon, black cardamom, bay leaf, dried red chili. Leave for about half a minute.
4. Then add red chili powder.
5. Transfer this flavoured oil into the pressure cooker in the dahl.
6. Add tamarind pulp and mix well.


Serve hot with steamed white rice. Alternatively, serve as an appetizer.

Monday, April 6, 2009

Chana dahl Chutney (Indian lentil condiment)

Chutney for Indians symbolizes spicy, tangy, or a sweet and sour mouth watering condiment. The Hindi translation of "to make chutney" is a common idiom meaning "to crush". This is because the process of making chutney often involves the crushing of ingredients together. Chutney can be of many types, coriander-mint chutney, peanut chutney, tomato chutney, mango chutney, or coconut chutney to name a few.

The use of a stone mortar and pestle is often regarded as vital to create the ideal chutney. It consists of a small stone bowl or a flat piece of stone (called a "sil") on which the ingredients are crushed together with a rounded stick of stone or wood (called a "lohra"). Once the ingredients have been crushed, it is tempered in flavoured oil and the ingredients are mixed together and then simmered slowly. Chutney is traditionally made to be eaten fresh, using at least one strongly-flavored ingredient. It serves the purpose of ketchup with Indian dishes.

This is my mom's lip smacking chutney or chatni recipe.

Ingredients:
1. 1/2 cup chana dahl
2. 5 tablespoon shredded coconut
3. 1/2 teaspoon Cumin seed powder
4. 3 tablespoon lemon juice
5. 1/2 inch ginger, shredded
6. 1/2 teaspoon rock salt
7. Table salt to taste
8. 1 green chili, chopped
9. 1/2 cup water
10. 5 tablespoons plain yogurt

For tempering:
1. 1 teaspoon mustard seeds
2. 1/4 teaspoon red chili powder
3. 3-4 fresh curry leaves
4. 1 tablespoon oil


Instructions:
1. Roast the chana dahl. Set aside and cool.
2. Grind the roasted chana dahl.
3. Put the ingredients 2 to 10 in a blender with the chana dahl and blend until the texture is course to smooth.
4. Transfer to a glass bowl.

Tempering:
1. Heat oil and add mustard seeds
2. When the seeds splutter, add red chili powder and curry leaves.
3. Spread this flavoured oil over the blended mixture.

Serve as a condiment with Idli (rice cakes) or Dosa (Indian crepe)

Thanks mommy!

Sunday, April 5, 2009

Summer Watermelon Splash

This is one of the best thirst quenching smoothie drinks you can get and a delightfully simple recipe. Both watermelon and mint are cooling, fresh ingredients. The scent of mint is invigorating and when combined with the natural unprocessed sugars in the watermelon, it will help give you an energy lift.

Madhu's post tempted my senses for watermelon. Yesterday, I bought my first watermelon of the season. And I made this:

Serves 1. No preparation required.
Ingredients:

300 g Watermelon pieces, seeds removed.
1 tablespoon lemon juice
7-10 mint leaves

Instructions:
Blend in a mixer.Serve chilled with ice cubes.

Although it's not summer yet on this part of the globe, back home summer is in full throttle. And this is in fond memory of my friends in India. I miss all of you!

Trivia: When looking for watermelon ripeness, the underside of the melon which touched the ground should be a yellowish color. Slap the side of the watermelon; if ripe, it will resonate with a hollow thump.

Watermelon is 92% water. But it is a medicine for all ailments. It's a complete balanced diet and one can live on it for a week without any supplements! Honestly, this has been tried and tested.

Saturday, April 4, 2009

Garnishing tip and techniques for food: Fascinate with fruits: strategic shaping

"Fruit can add fun, fruit can add color. Fruit can add taste, food can fascinate.
Not only does strategic shaping of fruits add a beautiful touch to any dessert
A fruity smell can cast a spell!"
- Food Fanatic's Random poetry

Welcome to post five of our Garnishing tip and techniques for food. For this post, Madhu, from South India, garnishes pudding with heart-shaped watermelon pieces. Watermelon is my favorite summer fruit. The sound of this itself makes my mouth water. The picture, no wonder then, makes me drool. Eye candy - hands down!

Garnishing with fruits is this week's tip for food decoration because a lot can be done with fruits. Cut melon, pineapple and apple slabs into interesting shapes, such as stars, moons, suns and flowers. These casting shapes can be found easily at the dollar store in the baking section. They can be arranged in a fancy glass bowl or along the side of a dish. Try piercing through the bottom of a fruit with a bamboo skewer and propped up in a small glass or vase. Halved cherries and cut strawberry pieces work well as flower centers, eyes and other small embellishments secured on the main design with a toothpick. One thing to keep in mind while shaping fruits is to make sure you cut the pieces large enough to hold their shape.

Cooking a meal for the special someone in your life or celebrating an occasion with home made food requires a lot of effort. All the time and effort would fall flat if it is not presented well on the table. Presentation is a very crucial part of every dish; you do not have to be a master chef of five star rated hotels to create the same class effect. Through this weekly series on garnishing tips and techniques, we present an exciting and new garnishing style from fellow foodies around the globe. So come join Food Fanatic in discovering and rediscovering many more garnishing styles and ideas in the coming weeks! Subscribe now ;)

Garnishing tip and techniques archive:
Unconventional wonders: use a stencil
Marvel with vegetables: carve carrots
Simplicity sensation: garnish with edibles
Contrasting charisma: garnishing by adding a riot of colors to the dish

Friday, April 3, 2009

Instant Dhokla (Indian Chickpea bread)

The closest North American version of Dhokla is cornbread. Dhokla is a very popular Indian snack that comes from the western part of India, specifically Gujarat. Gujarati food is famous for a touch of sweetness in every savory dish, and dhokla is no different. (Check out some other recipes on Gujarati food here).

Dhokla is healthy, quick, and tasty teatime food. The batter for Dhokla is made of chickpea flour which is steamed into a spongy cake (or bread) and finally tempered with flavoured oil. Dhokla has a moist cornbread like texture that melts in the mouth while the harmony of sugar and spice pampers your tastebuds. The bright yellow color of this dish can certainly add life to the dining table.

OK. I hope I have tempted you enough to be ready to cook up this delicious delight. :) Here you go with the recipe....

Ingredients:
1. 3/4 cup Chickpea flour (besan)
2. 1/2 cup water
3. 2 tablespoons lemon juice
4. 1/2 tablespoon sugar
5. 1 1/2 tablespoons olive oil
6. 1/2 teaspoon salt
7. 1/4 teaspoon turmeric powder
8. 1 packet Eno lemon salt (anti acid from India)

For the garnish:
1. 1 teaspoon mustard seeds
2. 5-6 fresh curry leaves
3. 1/4 teaspoon Red chili powder
4. 1 tablespoon oilve oil

Instructions:
For the bread:
1. Mix ingredients 1 to 8 together to form a batter.
2. Lightly oil a steel plate and pour the batter on the plate.
3. Put the plate in a steamer or dhokla maker and cook for 15 minutes on medium heat.
Note: You can alternatively bake the batter in an oven or use a microwave. A pressure cooker will work too if you don't have a dhokla maker.
4. Pierce a knife though it and if it comes out clean, it is done. Set aside and cool.
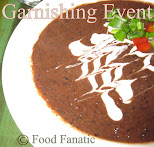

For the garnishing:
1. In a small pan, heat oil.
2. Add mustard seeds and allow to cracke.
3. Add curry leaves, red chili powder, 2 serving spoons water
3. Boil this.
4. Using a spoon spread this mixture all over the bread that was kept aside to cool.

Slice into bite size pieces and Voila! Your savory treat Dhokla (Indian Chickpea bread) is ready.

Serve Dhokla with mint-coriander chutney (which I will show you how to make in another post) and there is no chance that it will be a miss!

Wednesday, April 1, 2009

Aam panna or Aamjhora (Indian Mango-Mint drink)

Cool and refreshing - Aam panna is perfect for a scorching hot summer day. By definition, this drink is a heat resistant drink. It saves Indians from heat strokes. It is effective against the Loo which is a strong, hot (more than 45°C), and dry wind that blows in the Northern part of India. Aam panna is also a good source of vitamin B1 and B2 and contains sufficient quantity of niacin and vitamin C. Aam Panna is also considered as a curative for blood disorders. It increases the elasticity of the blood vessels. This drink is also considered as a tonic which increases body resistance against tuberculosis, anemia, cholera and dysentery.

Although I am in North America and complain of the cold and the rain, I know that I am in bliss when I hear about my friends and relatives back home having to operate in very high temperatures. Here's an ode to the saviour: Aam panna.

Ingredients:
1. Mint leaves, about 40
2. Raw green mango, about 5 small
3. 1/2 teaspoon cumin powder
4. 1/2 teaspoon kala namak (rock salt)
5. Table salt to taste
6. Sugar (optional)
7. 1 green chili
9. 4 cups water

Serves 4. No preparation required.

Instructions:
1. Boil the raw mangoes in a pressure cooker with 4 cups water and let 2 whistles to blow. When done, cool and set aside. Do not throw away the water. Save it for later.
2. Take out the pulp of the raw mango in a separate bowl. Then transfer to a blender.
3. Add green chili, salt, mint leaves, cumin powder and blend until an even texture of the liquid is formed.
4. Now to this blended mixture, add the water we saved after boiling the raw mangoes.

Refrigerate in a covered glass container and serve as a drink or with dahl and rice.

Search Food Fanatic

Food Fanatic Search Results