Friday, February 27, 2009

Tamatar aloo (Tomato curry)

I was super tired tonight but I really wanted to cook my dad something fresh. I know he likes a curry with Indian bread for dinner. So today I made him that. He is my biggest critic but said I get an A+ for tonight's dinner. I guess my effort was worth it after all ;)

I learned this recipe from my mother but I made modifications along the way.

Ingredients
1. 3 medium sized potatoes, chopped into inch sized Sqaures. Alternatively you can use mashed potatoes.
2. 2 large ripe tomatoes, chopped. My mom says more the tomato, better the taste.
3. 2 tablespoons olive oil
4. 1 teaspoon mustard seeds
5. 1 teaspoon cumin seeds
6. 1/2 teaspoon fenugreek (methi) seeds. I have learned that we add methi to any vegetable with gravy (curry)
7. 1/2 onion, chopped
8. 1 teaspoon garlic, minced
9. 1/2 teaspoon ginger, minced
10. 1/2 teaspoon turmeric powder
11. 1/4 teaspoon red chili powder
12. 2 teaspoons coriander powder
13. 2 teaspoons salt
14. 1/4 teaspoon garam masala
15. 1/4 teaspoon heeng
16. 1 teaspoon aamchoor powder (dried mango)

Instructions:
1. Heat olive oil in a pressure cooker.
2. Add mustard seeds and allow to crackle.
3. Add cumin seeds and fenugreek and allow the spluttering to fasten
4. Add onion, garlic, and ginger and cook until onion turns golden brown
5. Add turmeric powder, red chili powder, coriander powder, garam masala, amchoor powder, heeng, and cook until the oil leaves the onion-ginger-garlic paste.
6. Add potatoes and cook until the potatoes turn golden brown. This adds taste to the dish as the potatoes become slightly crunchy
7. Add tomatoes and cook for a few minutes.
8. Add 3 cups of water and add salt.
9. Close the lid of the pressure cooker, cook on high heat and allow 3 whistles to blow. If the tomatoes are not as ripe, allow 5 whistles.
10. Remove from the heat and allow the pressure cooker to open by itself.

I love to eat this with white rice. But usually it is eaten with roti or paranthas.

Thursday, February 26, 2009

Fried rice

Fried rice used to be my favorite lunch. Over the years, I have become more conscious of my diet, my figure, and my health which is why I moved away from it. Nonetheless, I enjoy it once in a while. For the past one week, I had been cooking Parantha (Indian bread with curries (sabzi) for my dad. So I figured I deserve rice today.

No preparation required. Serves 3.


Ingredients
1. 1.5 cup basmati white rice
2. 2 tablespoons olive oil
3. 1 teaspoon mustard seeds
4. 1 teaspoon cumin seeds
5. 2 big black cardamom
6. 1 bay leaf
7. few cashewnuts
8. 3/4 teaspoon turmeric powder
9. 3 teaspoons coriander powder
10. 1/2 teaspoon red chili powder
11/ 1/4 teaspoon garam masala
12. Salt to taste, I added 3 teaspoons in all
13. 1 cup frozen vegetables

Instructions:
1. Cook white rice in a rice cooker with water, 1 teaspoon salt, and a few drops of oil. The oil ensures that the rice doesn't stick to the bottom of the vessel. Once the riced is cooked, turn it gently, then leave it covered for a while.
2. In a big vessel, heat olive oil. You can use ghee but it wont be as healthy.
3. Add bay leaf and mustard seeds and let the seeds splutter
4. Add cumin seeds
5. Add turmeric powder, red chili powder, garam masala, black cardamom, cashewnuts, coriander powder and stir fry for a few minutes
6. Add the steamed rice and mix with the spices
7. Add frozen vegetables and rice and leave it covered for 10 minutes on low flame.

Eat with raita (yogurt) or just by itself.

Wednesday, February 25, 2009

Kale/Kabuli Chane (Garbanzo beans)

Garbanzo beans is a good alternative when you suddenly realize you are out of grocery or when you are fed up of veggies for dinner. Kale chane or Garbanzo beans is a variety of chickpea. It can be cooked in several ways and eaten at various times of the day, say for dinner as a substitute for veggies with Parantha or as a snack with evening tea. I cooked garbanzo beans for an office potluck and the container was all clean by the end of the potluck. Because Garbanzo beans is an edible legume, it is very high in protein. For this recipe, I used the Bengal variety which is brown in color.

Needs preparation. Serves 4-6

Ingredients
1. 1 tablespoon ghee (clarified unsalted butter)
2. 1 teaspoon mustard seeds
3. 1 teaspoon cumin seeds
4. 1/2 teaspoon fenugreek seeds (methi)
5. 1/2 a large onion, chopped
6. 2 tablespoons of tomato paste or freshly chopped tomato
7. Bay leaf, 2
8. 1/4 teaspoon red chili powder
8. 1/2 teaspoon garam masala
9. 2 teaspoons coriander powder
10. 2/5 cups of garbanzo beans, soaked overnight.
11. Salt to taste
12. Juice of 1/2 a lemon, squeezed
13. 1 tablespoon minced garlic
14. 1/2 tablespoon minced ginger
15. 1/4 teaspoon turmeric powder
16. pinch of Hing

Instructions:
1. Soak garbanzo beans overnight.
2. In a pressure cooker, heat ghee
3. Add bay leaf and mustard seeds
4. When the mustard seeds begin to crackle, add cumin seeds and fenugreek seeds.
5. When the spluterring fastens, add onion, garlic, and ginger
6. Fry until the onion turns translucent.
7. Add red chili powder, coriander powder, garam masala, turmeric, Hing.
8. Add tomato paste and stir fry until the ghee starts to seperate.
9. Add garbanzo beans, add salt, lemon juice mix well.
10. Add 3 cups of water and close the lid of the pressure cooker. Cook on high heat.
11. Allow 7-8 whistles to blow, then remove from heat. Let the pressure cooker lid open by itself.

Serve hot as an evening snack with Indian tea or as a veg with Paranthas for dinner.

Tuesday, February 24, 2009

Poha (Rice flakes)

Poha is one of my liked Indian snack. I have grown up having it cooked with boiled potatoes. When I moved to North America, my aunt showed how to cook Poha with raw potato and I have liked it that way ever since. Today, I was hungry and wanted to make a fresh snack for my dad. So I decided to go for Poha. I made some modifications to suit his palate, for example I used red chili powder instead of chopped green chili because he freaks out when he seeks green chili in his food.

So here goes the recipe.


Ingredients:
1. 2 cups of potato finely chopped. I used miniature frozen hash browns instead.
2. 150 g Poha (rice flakes)
3. Salt to taste
4. 4-5 sprigs fresh curry leaves
5. 1 lemon juice, squeezed
6. 2 fists of roasted peanut
7. 1/2 teaspoon red chili powder or 1 green chili chopped
8. 1 teaspoon mustard seeds
9. 1/2 medium sized onion, chopped
10. 1/4 teaspoon minced garlic and ginger
11. 1/2 large sized tomato, chopped
12. 1.4 teaspoon turmeric powder
13. 2 tablespoons olive oil
14. 1/2 teaspoon red chili powder

Instructions:
1. Pick and wash poha under running water. Use a gentle hand to not mash the flakes but ensure that the poha gets cleaned well otherwise it will taste bad. Drain the water and keep the poha aside and let dry.
Note: You can add a spoon of milk to the poha at this time which will make the poha softer.
2. In a pan, heat olive oil and add mustard seeds. You can also add a fist of urad and chana dal at this time to make the dish crunchy but I passed on adding the dals.
3. When the mustard seeds start to crackle, add onion, ginger and garlic
4. Fry until the onion turns golden brown.
5. Add peanuts and curry leaves. I used dry roasted salted peanuts without skin on but if you use peanuts with their skin on, it will make the dish look prettier.
6. Add turmeric, red chili powder and stir fry for another 5 minutes.
7. Add tomato and cook until the tomato softens.
8. Add potato and cook until potato turns golden brown.
9. At this time, squeez the juice of 1 lemon into the poha and add salt to taste (I added 2 teaspoons).
10. Mix well.
11. Add the poha. You will notice that the poha would have puffed up and dried by now. Mix everything with a gentle hand.

Serve hot with tea and dhania ki chutney (coriander condiments) which I will show you how to make in another post.

This serves as an ideal evening snack or for breakfast.

Wednesday, February 18, 2009

Chole (Chickpeas)

Ingredients:
1. 1 can (540 ml) chickpeas
2. 3 tablespoons tomato paste
3. 1/2 medium sized onion, chopped
3. 1/2 tablespoon minced garlic and ginger
4. 3-4 tablespoons olive oil
5. 1 teaspoon cumin seeds
6. 1 teaspoon mustard seeds
7. 1 bay leaf
8. 2 dried red chili
9. 4 heaping teaspoons chana masala (chickpea)
10. 2 tablespoons lemon juice
11. Salt to taste
12. 1/4 teaspoon red chili powder
13. 1/4 teaspoon cumin powder
14. 1/4 teaspoon garam masala

Serves 3-4. No preparation required when using canned chickpeas.

Instructions:
1. Heat olive oil in a pan
2. Add mustard seeds, red chili dried, and bay leaf and allow mustard seeds to splutter
3. Add cumin seeds and let it turn brown
4. Add onion, garlic and ginger and until the onions turn translucent.
5. Add tomato paste and mix well.
6. When the tomato and onion paste start to leave the oil, add chickpea masala, red chili powder, garam masala, cumin powder and saute.
7. Add chickpea, salt, and lemon juice. Mix well and leave covered for about 15 mins on low heat, stirring occasionally.

Garnish and serve with hot paranthas or over a bed of steamed rice.

Parantha (Indian bread)

Parantha is the staple diet of North Indians. In a typical North Indian home, Parantha accompanied with some cooked vegetables is what makes lunch and dinner. Parantha is nothing but Indian bread and is best enjoyed fresh. Paranthas can be stuffed with potato, raddish, cauliflower or be plain and eaten with cooked vegetables.

Here is what differentiates Parantha with any other type of Indian bread:
  1. Parantha is cooked with oil. (Roti is cooked without oil)
  2. It is made of 100% whole wheat.
  3. Paranthas are usually triangular in shape and bigger in size. (Roti is round)
  4. While rolling a parantha, you add a few drops of oil, fold it to form a traingle, then flatten it with a rolling pin.
  5. The dough for parantha is neither too hard nor too soft. (The dough for poori is hard).
  6. Paranthas are not supposed to be incredibly thin or thick. However, thickness is a matter of personal choice.
I love to have parantha for dinner, lunch and sometimes even breakfast because it's filling and healthy. It gives me that satiating feeling that seldom any other dish can provide. Having parantha with salad, Indian vegetables, raita (yogurt), and pickle is a delight. However, making paranthas every day does seem like an ordeal when cooking just for myself.

No preparation required. Serves 4.

Ingredients:
1. 3 cups Whole wheat (aata)
2. 3-4 tablespoons oil
3. 1 teaspoon salt
4. Water

Instructions:
1. Add 1 to 4 in a big bowl and knead to make a dough. Add sufficient amount of water such that the dough is neither too hard nor too soft.
Note: Ingredient 2 and 3 are optional but recommended. I have tried making parantha both with and without oil and salt. When I add salt and oil to the dough, I find the dough easier to roll and give shape. Also, the parantha turns out softer and tastier.
2. Make small balls out of the dough by rolling it between your palms.


3. Using a rolling pin, flatten the ball and give it your desired shape. Ideally, I add a few drops of oil, fold it to form a triangle then flatten it with a rolling pin. But this time I decided to keep it round. I didn't add oil while rolling because I had already added a few drops in the dough.
Note:If the dough starts to stick to the counter, sprinkle some wheat on it.


4. On a heated pan, lay the uncooked parantha bread. When it turns golden brown, flip to the other side. You may like to spread a layer of olive oil on each side before flipping.

Serve hot with vegetables and Raita. Add a blob of butter if your diet so allows :).


Food trivia: To store the dough for later use, cover the dough in plastic wrap and keep it in the fridge. It's best to have it consumed within 3 days. To keep the cooked paranthas soft, wrap them in a cloth or paper towel and store them in a hot case or a plastic box. Put the parantha in the microwave for 30 seconds before eating.

Monday, February 16, 2009

Mixed Vegetables

Mixed vegetables is the healthy option. I don't make it very often but it is a great choice when I have lot's of vegetables but not enough of any one ;)
Mixed vegetables can include about any vegetable you like but you will need to be careful about their cooking times to ensure that the dish turns out well. For example, carrot might take longer than eggplant to cook. So either you add the carrot in first or you half cook the carrot separately and then mix them together. I like to mix vegetables with similar cooking times but mostly I end up mixing whatever is in the fridge.


Ingredients:
1. Carrots, half a pound
2. shredded or sliced small Cabbage
3. 1/4 cauliflower, florets cut
4. 1 cup frozen peas
5. 3 tablespoons olive oil
6. 1 teaspoon mustard seeds
7. 1 teaspoon cumin seeds
8. 1 bay leaf
9. 1/2 tablespoon minced garlic and ginger
10. 1.2 teaspoon aamchur powder (dried mango)
11. 1/4 teaspoon garam masala
12. 2 teaspoons coriander powder
13. Salt to taste
14. 1/4 teaspoon red chili powder
15. 1 dried red chili
16. 1/4 teaspoon turmeric powder


Instructions:
1. Heat olive oil and add bay leaf, dried red chili and add mustard seeds in it.
2. When mustard seeds start to splutter, add cumin seeds
3. Add turmeric powder, coriander powder, red chili powder, garam masala, aamchur powder in the oil.
4. Add garlic and ginger and saute for about one minute.
5. Add vegetables and cook for about 15 minutes. Add salt when half done. If you add salt to vegetables right at the start, they will leave water. This spoils the taste and look of the veggies that would otherwise turn brown and crispy with the dry heat. If you add salt once the veggies are fully cooked, they will get mushy on mixing them. So add salt when half cooked. :)
6. Cover and let simmer on medium to low heat stirring occasionally for about 20 minutes.
7. Turn heat down and cook for another 5 minutes or until all vegetables soften.

Serve hot with Roti or Paranthas. A healthy wholesome dinner is ready!

Thursday, February 12, 2009

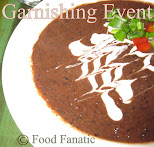
EVENT: Garnishing tips and techniques for Indian food


Garnishing and food presentation is an art. A beautifully crafted dish is more inviting and makes the meal more memorable.

There have been so many instances when I considered taking a course on food decoration. Fanciful and exciting as it may sound, I could not find such a course. I soon realized that learning about food presentation and decoration is nothing but a quest and a never ending process. There are no rules and regulations, and the skill cannot be taught. Garnishing is personal style and does not need to be elaborate. Simplicity can suffice. The more you experiment and research, the better you get at it.

I have a long way to go and with each attempt to decorate my food, I learn something.
Garnishing only with edibles, using contrasting colors, carving (read: trying to carve) raw vegetable, and not overpowering the visibility of the main ingredient in the dish have become some regimes of my personal style. And I continue to learn and build up on my personal style.

More specifically here are some of my garnishing ideas:
1. I love to sprinkle Cilantro on any Indian dish specially vegetables because it adds color and I love the taste of fresh cilantro!
2. Add Butter or cream
3. Use overlapping onion rings

This event is about sharing and showcasing garnishing skills. You will need to cook up an Indian meal and garnish it. I will feature one post per week as a part of this series.

Guidelines:
  1. The deadline for Garnishing tips and techniques for Indian food is March 15, 2009.
  2. You can use any post from your archive.
  3. The post should preferably be about the presentation or garnishing of an Indian dish but is not restricted to any cuisine.
  4. You must have a picture of the garnished dish on your post and it must be the picture of your recipe.
  5. Link back to this announcement, and feel free to use the logo above.
  6. Send me an email with your post at food[dot]fanatic[dot]recipes[at]gmail[dot]com. In the subject say Garnishing Event.
  7. Please include the following details:
  1. Your name
  2. Blog name
  3. Post URL
  4. What's special or defines your presentation or garnishing style (some rules you follow etc)
  5. How you garnished it
I'll get the photograph from your post. I'll email you to let you know when your post is being featured. Looking forward on hearing from all of you.

Update:
Unconventional wonders: use a stencil
Marvel with vegetables: carve carrots
Simplicity sensation: garnish with edibles

Paste Penne with Garlic and mustard sauce

Pasta once again...this time without any tomato or cheese...for the vegan. Without ado, here we go!

1. Olive oil, 3 tablespoons
2. Frozen vegetables (carrots, broccoli, cauliflower)
3. Catelli Whole wheat Pasta penne, 1/4 box
4. Minced garlic, 1 tablespoon
5. Minced ginger, 1 tablespoon
6. Red chili sauce
7. Dijon mustard sauce, 1/4 tablespoon
8. Freshly ground black pepper, a dash
9. Salt to taste
10. Lemon (optional)


Instructions:
1. Boil water in a big pot.
2. Add pasta and allow to cook for about 45 mins.
3. When the pasta softens, drain water and keep aside.
4. In another pan, heat olive oil.
5. Add minced garlic and ginger and fry for 2-3 mins.
6. Add vegetables and cook for 5 minutes
7. Add mustard and red chili sauce and cook for another 2 mins. These two ingredients give the bland pasta a kick!
8. Add pasta and mix well.
9. Add salt and freshly ground black pepper, lemon, and red chili sauce.

Serve hot with salad or mashed potatoes! Tasty and wholesome dinner in a jiffy!

And this post was specially composed for The Italian event of Vaishali's Holy Cow!

Saturday, February 7, 2009

Pasta Penne

Pasta is an Italian word that means dough. In the culinary world, it commonly used for a dish in which the primary ingredient is 'pasta' (can be in the form of noodles, spaghetti, lasagne etc). Pasta comes in many shapes such as penne, rotini and so on. I was almost unknown to pasta until I landed in North America. In this recipe, we use the penne style pasta. Pasta is easy and quick dinner when I am tired after a long day of work or when I am bored of Indian food.

Here is my tribute to pasta...

Serves 4. No preparation required.

Ingredients:
1. 1/4 a box of Catelli whole wheat Penne pasta
2. 1 can (680 ml) tomato sauce
3. 1 can cheese sauce
4. 2 tablespoons oregano
5. 2 tablespoons basil
6. dash of ground black pepper
7. 4 tablespoons olive oil
8. 1 medium sized red onion, finely shopped
9. 1 small green or red pepper, cut into cubes
10. about 1 pound broccoli, florets cut
11. 1 green pepper, chopped into squares
12. 1-2 carrots, vertically sliced
13. olive oil, 4 tablespoons
14, 1 tablespoon minced garlic and ginger

Instructions:
1. Boil water in a saucepan
2. Add the pasta to the boiling water and cook pasta for about 45 mins until pasta is soft and tender.
3. Drain the water and keep pasta aside.
4. In another pan, heat olive and fry onions, ginger and garlic.
5. Add vegetables and then add basil, oregano, pepper and cook until vegetables are tender.
6. Add tomato sauce and cheese sauce and cook for 10 mins.
7. Add pasta and mix the sauce with the pasta.
8. Cook for another 10 mins on low heat.

Serve with a side of instant or home-made mashed potatoes.

Thursday, February 5, 2009

Matar paneer (Peas cheese)

Warning! This dish is high in calories :)

This dish is another sought after delicacy by North Indian and around the world food fanatics! No North Indian restaurant would commit the sin of leaving this dish out of their menu. Matar paneer is traditionally considered a dish of the rich and therefore you will find it at any party or feast. The dish is prepared in a lip smacking tangy and spicy sauce with more peas then cottage cheese. Some people like to fry the cottage cheese but I prefer not to because that is not healthy.
And no kidding, it makes this dish a lot easier to make!

No preparation required. Serves 4-6.

Ingredients:
1. 5 cups frozen green peas. Remember this is matar paneer not paneer matar!
2. 1 block cottage cheese, sliced into sqaures
3. 1 tablespoon salt
4. 1 teaspoon cumin powder
5. 2 heaping teaspoons coriander powder
6. 1/4 teaspoon turmeric powder
7. 1/4 teaspoon red chili powder
8. 1 teaspoon garam masala
9. 1 teaspoon mustard seeds
10. 1 teaspoon cumin seeds
11. 1 bay leaf
12. 1 dried red chili
13. 5 tablespoons olive oil
14. 1 medium sized onion
15. 3 tablespoons tomato paste
16. coriander leaves to garnish
17. 1 teaspoon minced garlic ginger

Instructions:
1. Heat olive oil in a pan and add bay leaf and dried red chili
2. Add mustard seeds and allow to splutter
3. Add cumin seeds and when they turn brown, add garlic, ginger, and onion
4. Fry the onions and garlic/ginger.
5. Add coriander powder, garam malasa, turmeric powder, cumin powder, red chili powder and then add tomato paste.
6. Sautee until the oil starts to leave the onion tomato paste we made.
7. Add peas and cook until peas are warm
8 Add salt and cover the pan over low heat and cook for 10 minutes. Covering is important because we want the moisture from the peas mixed with masala to be absorbed by the cheese. If the vegetables look dry, add a few spoons of water.
9. Add cottage cheese slices and cook covered for another 10 minutes, stirring gently to mix the paste and peas with the spices. Make sure not break the slices of cheese while turning.
10. Garnish as desired

Serve hot with roti or paranthas.

Food Trivia:
Cottage cheese is called paneer in Hindi. It is a bi product of milk and is the base ingredient for several desserts and main course meals. Paneer can be made at home by adding a few drops of lemon juice to milk and allowing the fat to separate from the milk.

Tuesday, February 3, 2009

Dal makhani modified (Lentil butter)

Dal Makhani is a must have entrée at any North Indian restaurant. It is considered a part of a sumptuous meal and a special dish for many Indians. You will often find this delicacy at parties and at feasts. The traditional way to cook Dal Makhani was to do so slowly and for hours on charcoal heat. This would give it a creamy texture. In this Any-time-on-demand world, the recipe has changed. The modern recipe involves cooking the lentils quickly and adding cream for the desired texture.

To each one, her own. And rightly, this recipe is modified by me. It was a long day, the fridge was empty, and my body was tired but does my palate listen? No. I was still craving Dal Makhani and had been for a long time. I had soaked kidney beans which was a motivator. So, I decided to cook it quickly, my way - the convenient way.

Needs preparation. Serves 4-6.

Ingredients:
1. 3 fists Kidney beans, soaked for 8 hours
2. 6 fists black lentils, washed and soaked for 10-15mins.
3. 3/4 teaspoons garam masala
4. 1 small onion, finely chopped
5. 1/2 tablespoon grated ginger
6. 1/4 tablespoon grated or crushed garlic
7. 1 heaping tablespoon full of ghee or clarified butter
8. 1 teaspoon mustard seeds
9. 1 teaspoon cumin seeds
10. 1/2 teaspoon fenugreek seeds
11. 1 Cinnamon stick
12. 1 bay leaf for aroma
13. 1 dried red chili
14. 2 teaspoons full of coriander powder
15. 1 teaspoon cumin powder
16. 1.5 teaspoon salt
17. 1/4 teaspoon turmeric powder
18. 1.5 tablespoon sour cream
19. 1/4 teaspoon asafoetida
20. 1/4 teaspoon red chili powder
21. 3 glasses of water


Instructions:
1. Heat ghee in a pressure cooker.
2. Add bay leaf, red dried chili, cinnamon stick, and mustard seeds and allow to crackle.
3. Add cumin seeds, fenugreek and wait until the popping sound fastens.
4. Add ginger, garlic, onion and fry until the onion turns golden brown.
5. Add cumin powder, turmeric powder, coriander powder, garam masala, red chili powder, asafoetida.
6. Cook for a few minutes until the fat starts to leave the masala. You will see the yellow color of the ghee seperate from the onion.
7. Add soaked kidney beans and lentils and water.
8. Add salt and close the lid of the pressure cooker. Allow at least 8 whistles to blow.
9. Turn off the heat. Allow the lid to open by itself. Then add cream and cook with a covered lid for another 5 minutes.
10. Serve hot and garnish as desired.

This can be eaten as a hearty soup, as curry with Roti or with parantha. It tastes even better the next day because the lentils absorb the spices with time.

Things I could have gone without: bay leaf, cinnamon stick, coriander powder.
Things I could have done: Add tomato, fennel seed powder, use a slow cooker instead of a pressure cooker, use whole black gram lentil instead of black lentil, cook lentils and kidney beans separately and mash the lentils for a smoother texture.

Kitchen flavours and Trupti told me about Lentil Mela and suggested I participate. So here I go!

Monday, February 2, 2009

Stuffed Eggplant/Brinjal (Bharva baigan)

Eggplant is known as Brinjal in some South Asian countries. The vegetable Eggplant is native to India.
Stuffed eggplant is one of my favorites. You must be thinking that I cook a lot of eggplant. The reason is that eggplant is one of the few vegetables found abundantly in the grocery stores in North America. Eggplant also comes in various shapes and sizes so the add on point to this vegetable is that it can easily be cooked in a lot of different ways. This recipe uses the Indian eggplant variety.

No preparation required. Serves 6.

Ingredients:
1. 1.5 pounds Indian eggplant (this one is actually sized and shaped like an egg!)
2. olive oil 4 tablespoons
3. 4 tablespoons dhania powder
4. 1 tablespoon garam masala
5. 1 tablespoon cumin powder
6. 1/2 tablespoon red chili powder
7. 1/4 tablespoon turmeric powder
8. Salt to taste

Instructions:
1. Mix ingredients 2 to 8 in a bowl, but with only a few drops of olive oil and mix well to make masala (stuffing in this case).


2. Slit the eggplants on the sides such that it is wide enough to fill the masala (spices). A small sharp knife will help make uniform vertical slits from the stem to the base. Be careful not to break the eggplants into 2 parts. You can make multiple slits so that masala can be added and or absorbed on multiple sides to make it more flavorful.


3. Fill in the masala made in step 2 in the slits you made.
4. In a pan add olive oil and cook on low flame until the eggplants soften.

Indian eggplant is ready to relish with rice or Paranthas.

In North America, I wouldn't be surprised if this was served as an appetizer because it can be picked up and eaten like finger food too!

Search Food Fanatic

Food Fanatic Search Results