Sunday, March 29, 2009

Garnishing tip and techniques for food: The contrasting color charisma

Bonjour! Welcome back to post four of Garnishing tip and techniques for Indian food. It's Spring and the perfect time to try new garnishing adventures in the kitchen. The world around us might still be a little drab right now, but soon it will be bursting into lush and radiant colors. An easy way to kick-start spring indoors is by using vibrant color contrasts on the plate. So here we are today exploring the charisma of contrasting colors in food.

Today's post features my Paris located reader, PriyaSuresh. Priya is a talented cook who is also endowed with crafting skills. No wonder then does aesthetic sense and food decoration come across so naturally!

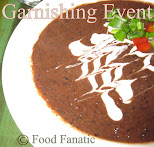
Priya says her technique to make food look more inviting is to sprinkle on it an edible. The key however is to choose an edible that has a different color than the dish itself.

Priya's garnishes her beautiful Rose kalakand, with green pistachios while her Mango and Tapoica pudding has been decorated with white almond flakes.

No doubt do contrasting colors brighten and spring up the look of a delicacy. Salsas, chutneys, and condiments etc can sometimes add a riot of color to a bland presentation. Try serving them on the plate instead of in a dish on the side. Your efforts will be rewarded with Wows. So next time you are confused over the garnishing part of a dish that took you hours to cook, consider throwing in some color to add life to your delicious treat and sit back to enjoy the rave reviews!

As they say it, we eat with our eyes as well as our mouths. A dish that arises an appetite is the one that makes your mouth water just at the sight of the dish. To make a dish looks appealing may only need simple instructions and some forethought to make it look that enticing. So keep reading, Food Fanatic has many more posts on Garnishing tips and techniques coming up!

Garnishing tip and techniques archive:
Unconventional wonders: garnish using a stencil
Marvel with vegetables: garnish by carving carrots
Simplicity sensation: garnish using ingredients of the dish

Saturday, March 28, 2009

Sambhar (Spicy south Indian lentil stew)

Sambhar is a popular South Indian and Sri Lankan dish liked by North Indians the same. Sambhar is a vegetable stew or chowder based on a broth made with tamarind and toovar dahl.
South Indian food, people, and culture are inexorably linked to a ubiquitous dish as in idli (rice cakes) and sambhar, sambhar and rice and so on. Each state in the South prepares it with a typical variation, adapted to its taste and environment.
Sambhar is my all time favorite. A lot of things changed but my liking for sambhar never did. Sambhar was the first few things I learned to cook.

No preparation required. Serves 4-6. But I can finish this all by my self :P

Ingredients:

1. 7 fists arhar/toor dahl
2. 1/2 teaspoon turmeric powder
3. 2 teaspoons salt.
4. 1 tablespoon minced garlic
5. 1/2 tablespoon minced ginger
6. 1 small onion, chopped
7. 1 small tomato, chopped
8. 1/2 zucchini or bottle gourd cut in inced sized squares. You can also add okra, eggplant, drum sticks if you want.
9. 3 teaspoon sambhar masala. I used MDH.
10. 2 tablespoons olive oil
11. 1 heaping teaspoon mustard seeds. I like to add fenugreek seeds and asafoetida as well but my mom butted in and didn't let me this time. ;-)
12. 4-5 fresh curry leaves
13. 1 dried red chili
14. Tamarind pulp (imli ka saar)
15. 1 green pepper, chopped into inched sized squares.

Instructions:

For the dahl
1. Soak arhar dahl in water for about 15 mins. Wash and then put it in a pressure cooker.
2. Add turmeric powder and salt.
3. Add water water to this - about a finger's depth of water from the dahl to the surface.
4. Cover the lid of the pressure cooker and let 2 whistles to blow.

For the masala
1. Heat olive oil in a pan and when hot, add mustard seeds.
2. When the seeds splutter, add curry leaves and red chili.
3. Add onions and fry until they turn golden brown.
4. Add ginger and garlic and fry for a few minutes. Then add tomato.
5. When the tomato is al dente, add green pepper, zucchini, and sambhar powder.
6. Add tamarind pulp.
7. Cover and cook until all vegetables are al dente.

When the pressure cooker's lid opens, add the masala and boil with an open lid for about 5-10 minutes.

Server hot with steamed white rice and roasted potatoes for lunch. Alternatively, you can have this with idli (rice cakes) or dosa (Indian crepe) which I will show you how to make in another post.

Friday, March 27, 2009

Bharva Karela (Stuffed Bitter melon)

OK. I made this for the first time in my life today. I have had it before but never cared to learn how to cook this vegetable. But as I get bored of cooking the same stuff everyday, bitter melon needed my attention!

Bitter melon is a vegetable that originated in South Asia. The vegetable has a distinct warty looking exterior and an oblong shape. It is hollow in cross-section, with a relatively thin layer of flesh surrounding a central seed cavity filled with large flat seeds and pith. Bitter melon comes in a variety of shapes and sizes. The bitter melon more typical of India has a narrower shape with pointed ends, and a surface covered with jagged, triangular "teeth" and ridges. Coloration is green or white. Bitter melon has great medicinal value and stimulates digestion, aids in curing diabetes, HIV, malaria and so on. It's a vegetable high in vitamins, specially vitamin C. Who would be stuck up on it's appearance after knowing all this? Not I.

Bitter melon is stuffed with spices and then fried in oil, which is very popular in North Indian cuisine. The bitterness is mellowed down by the sweetness of fried onions stuffed in the shell to create a perfect balance to truely awaken your taste buds. Here is how you go about it:

Ingredients:
1. 1 medium sized onion, sliced into thin slices
2. Olive oil for frying
2. 1 teaspoon fennel powder (sauf)
3. Salt to taste
4. 1.5 teaspoons coriander powder
5. 1/4 teaspoon turmeric powder
6. 1/2 teaspoon red chili powder
7. 1 teaspoon amchoor powder (dried mango)
8. 1 teaspoon fennel seeds

Instructions:
1. Lightly peel the triangular 'teeth' ridges of the melon.
2. In a pan, heat olive oil. Then lightly fry the melons on medium heat until it turns blackish. Keep turning to avoid burning. When done, remove from the heat and let cool.
3. When cool, slice the melon vertically and remove the seeds from the inside. All we need is the shell.
4. Lightly coat the inside of the melon with a pinch of turmeric and salt.

For the masala
1. In a separate pan, heat olive oil then add sauf.
2. Fry onions and sauf until the onions turn golden brown. The sauf (fennel) and fried onion counter the bitterness of the vegetable.
4. Add sauf powder, turmeric powder, coriander powder, red chili powder, salt and cook for 5-10 minutes.
5. Let this cool.


Add the masala inside the slits of the melon. Cook the melon on low heat for about 5 minutes.

Serve with steamed rice and dahl.

Wednesday, March 25, 2009

Cabbage Peas

So, my mom has been spoiling me all this while. Although I help her, she never let's me cook the full meal. But today I finally managed to get both my hands on the stove. Here is what I cooked up.

Ingredients:
1. 2 pounds Cabbage, shredded or sliced
2. 1 medium sized potato, chopped into wedges
3. 2 tablespoons olive oil
4. 1 teaspoon mustard seeds
5. 1 teaspoon cumin seeds
6. 1/2 teaspoon turmeric powder
7. 2 heaping teaspoons coriander powder
8. 1/2 teaspoon red chili powder
9. 1 bay leaf
10. 1 teaspoon amchoor (dried mango) powder
11. Salt to taste
12. 3/4 cup peas
13. 1/2 tablespoon garlic, minced
14. 1/4 tablespoon ginger, minced
15. 1 small tomato, chopped
16. Pinch of heeng

Instructions:
1. Heat oil in a big pan.
2. When the oil is hot, add a bay leaf and mustard seeds.
3. When the seeds start to crackle, add cumin seeds, ginger, and garlic.
4. Add turmeric powder, heeng, red chili powder, and sautee on medium heat for a few minutes.
5. Add tomato and cover lid. Cook on low heat for 5mins.
6. Add potato wedges and cook until they discolor slightly.
7. Add cabbage and coriander powder and mix well.
8. Add peas and cover. Cook for 15 minutes, mixing occasionally.
9. When the vegetables start to stick to the bottom, add salt. This will make the vegetables release water and prevent them from sticking.
10. Add amchoor powder and cook for another 15 mins on low flame or until done.

Garnish as desired and serve hot with paranthas or as a filling to a sandwich. Green leafy vegetable galore!

Tuesday, March 24, 2009

Garnishing tip and techniques for food: Simplicity sensation using ingredients from the dish

Welcome back to post three of garnishing tips and techniques for Indian food. Through Garnishing tips and techniques we endeavor to project myriad and fascinating ways to make food look more appealing. As a part of this series, every week we will present an exciting and new garnishing style from fellow foodies around the globe. I hope that my readers have been thoroughly enjoying this series as much as I have been having fun presenting fellow foodies and their incredible food decoration styles. I've been by swamped by emails for this event and I sincerely thank all those who came out to willingly share their garnishing secrets with us.

Today, I present in front of you: Kalva from our own CurryinKadai. I am particularly fond of Kalva's simple yet sensational garnishing style. From the United States, Kalva sends us her Seasoned Spicy Black Eyed peas garnished with edibles! Kalva's says her garnishing mantra is to use ingredients of the recipe for the garnish. Isn't that an easy yet smart thing to do? Her black eyed peas stole my heart as she placed a fresh green curry leaf at the center of the bowl and as she threw in some lively bright yellow ( with a piece of lemon on the side) to add visual interest. Kalva is one of those people I have admired for being modest and for being able to make an impression without having to try too hard. This dish looks great and I am sure it tastes great too! The garnishing definitely makes your dish more inviting, Kalva! Thanks for sharing this with us!


Next week, we will bring forth another incredibly talented fellow foodie. Keep reading!

Garnishing tip and techniques archive:
The unconventional wonder: How to use a stencil for decorating food
The vegetable marvel: How to carve carrots

Sunday, March 22, 2009

Bharva baigan reloaded!

In a previous post, I showed you how to make bharva baigan with Indian eggplants. Today, we use Chinese eggplants and a slightly modified spice mix to make this dish.


Ingredients:

1. 1/4 teaspoon heeng
2. 4 teaspoons dhania (coriander) powder
3. 1 teaspoon red chili powder
4. 1.5 teaspoon fennel powder
5. 1.5 teaspoon salt or to taste
6. 1 tablespoon olive oil
7. 2 teaspoon cumin powder
8. 1 teaspoon garam masala
9. 2 teaspoons amchoor powder (dried mango)
10. 1/2 teaspoon turmeric powder
12. Chinese eggplant


Instructions:
1. Cut the Chinese eggplants into 2 inches long cylinders and make slits on one side
2. Fill the slits with the masala
3. Heat oil in a pan
4. Cook eggplants on low heat, covered, until the eggplants soften. Turn gently occasionally so that it gets evenly cooked.

Serve with steamed rice and dahl or as a sabzi (vegetable) with paranthas!

Saturday, March 21, 2009

Salad decoration

Salad goes with about everything and will be welcomed by everyone alike because it's healthy. There are many types of dressings out there but sometimes it's just fun decorating vegetables and not worrying about the dressing. There are lots of ways to make your salad look pretty. This is one simple way. It was fun doing this. The key was to group together similar shapes and colors. Having orange in the middle circle and light colors on the innermost and uttermost circles brought out the visual interest. The directions to make the strategically placed tomato rose will be presented in another post. Stay tuned...

How do you decorate your salad?

Friday, March 20, 2009

Bhature (Indian fried bread)

Chole bhature (Hindi: छोले भटूरे) is a famous North Indian dish. It is also a street food. It's not the healthiest option for dinner but definitely a relished one. I had bhature after more than two years today.

I've previously posted the recipe for chole. Here is the recipe for bhature.

Needs Preparation. Serves 4.


Ingredients:

1. 500 gms maida (all purpose flour)
2. 1 teaspoon sugar
3. 1/2 teaspoon sugar
4. 4 tablespoons oil
5. 8 tablespoons fat free plain yogurt.
6. Canola oil for frying.

Instructions:
1. Mix all with water and knead to make a dough. Leave the dough covered overnight.

To make the bhature:
1. Make small balls of the dough and using a rolling pin, flatten to form an oval.
2. Heat oil in a vessel. The oil must be very hot to be able to fry the bhature. To check this, add a tiny bit of the dough to the oil. If the dough surfaces immediately with tiny bubbles around it, the oil is ready to fry the bhature.
3. Fry the flattened bhature until it turns golden brown.

Tak it out on a paper towel to absorb the oil. Serve hot with chole.

Try chole bhature with onions on the side and have lassi (Indian yogurt drink that I will show you how to make in another post) as a drink. Total bliss!

Search Food Fanatic

Food Fanatic Search Results