Tuesday, March 8, 2011

Hyderabadi Chicken Biryani

Biryani is my favourite dish. Whenever I go out, I try to order Biryani. I have always yearned to cook Biryani the right away. My several endeavours never met the mark I would have liked. I tried to coax my friend's mom who is from Pakistan to teach me how to cook Biryani but lost the battle :) I wondered what people did that made this dish taste so delicious!

Recently, I got back in touch with one of my college friends who married a sweet guy from Hyderabad. While chatting away with her and catching up, she mentioned she cooks Hyderabadi cuisine. I jumped at the opportunity and urged she give me the recipe for Hyderabadi Chicken Biryani. What could be better? She did!! Thanks, Nidhi. This dish took dinner by storm.  Mr. Husband said it tasted like the ones at the restaurant! This time I hit the right note!


I tweaked the recipe to my taste, convenience, and ready availability of ingredients. Maybe I can call it my recipe based on my friend's. :)

Ingredients:
1. 1 pound chicken breasts, cut into bite size pieces
2. 3 pods of garlic, shredded
3. Ginger, a 2 inch piece, shredded
4. Cinnamon sticks 4
5. Cloves 4-6
6. 1 Bay leaf
7. 4-6 cardamom, whole
8. Salt to taste.
9. Oil
10. Yogurt, 2-3 tablespoons
11. Chicken malasa, 4-6 tsp
12. 1 tsp chili powder
13. Turmeric powder, 1 tsp
14. 1 tsp garam masala
15. 2 onions, thinly sliced.
16. 2 cup rice

Instructions:
1. Cut and wash chicken breast pieces
2. Put chicken in a bowl and add yogurt, turmeric powder, 2-3 tsp chicken masala, salt (I added 1 tbsp) and mix well.
3. Leave it to marinate.
4. Heat a wok and add oil, 2-4 cardamom, 2-4 cloves, 2 pieces of Cinnamon stick, then add onions, garlic, ginger, garam masala, 2-3 tsp chicken masala and fry till the onions turn golden brown.
5. Add the marinated chicken in this and a little bit of water.
6. Boil until the chicken is fully cooked. Stir occasionally.
7. In the meantime, wash rice and place it in a rice cooker. To the rice add water, oil, bay leaf, 2-4 cardamom, 2-4 cloves, 1 tsp salt, 1-2 cinnamon stick. Cook the rice until fully done.
8. Line an oven safe dish with aluminum foil. Add a layer of the cooked rice. Then top it with a layer of cooked chicken, then top it with a layer of rice and so on.
9. Cover the oven safe dish with aluminum foil
10. Cook in the oven at 350 deg c for 5 mins.
11. Mix the rice and then cook for 5 more mins in the oven at the same temp.


Serve warm with Raita and Salad


Friday, March 4, 2011

Pao Bhaji

Pao Bhaji is Indian street food. Pao Bhaji is a potato/tomato based curry that is often eaten as a snack in western India. Pao means bun and Bhaji means vegetables.


It's Mr. Husband's favorite. Pao bhaji is relatively easy to cook and tastes delectable!

You certainly won't regret this one :)

Let's get cooking...


Ingredients:
1. 2-3 tablespoons of ghee
2. 4 potatoes boiled, peeled, mashed.
3. 1/2 small cauliflower boiled, mashed.
4. 1 cup green peas
5. 2 tablespoons tomato paste
6. 1/2 onion chopped
7. 1 thai chili, chopped (optional)
8. 4-5 tsp pao bhaji masala
9. Salt to taste
10. Carrots and green beans (optional), boiled and mashed

Instructions:
1. In a pressure cooker, add potatoes and cauliflower and allow it to boil. 5 whistles should do it. Mash the vegetables coarsely.
2. Heat ghee in a wok and when hot add chili and onion.
3. Saute until translucent.
4. Add tomato paste and mix well.
5. Add pao bhaji masala and cook on high heat until the paste leaves the ghee.
6. Turn the flame down to medium and add the mashed vegetables. Mix well and cook for another 5-10mins
7. Add Salt and peas.
8. Cook for another 5 mins and mix well.

Garnish with freshly chopped coriander leaves and serve warm with pita bread, roti/parantha, or bread/buns.

Potato Salad

Potato salad is a side dish, served cold, that is a winner at summer barbecue parties, potlucks, picnics, pool parties, or any party where the grub table is full of snacks or finger food. The good thing about Potato salad is that it's easy to prepare, takes minimal time and ingredients, is rather low cost, does not need warming before serving it, and sits well with most people - vegetarian or not.

Next time you're invited to a party, consider taking this for your hosts and then sit back and enjoy the praise :)

Ingredients:
1. 4 Potatoes boiled, peeled, cut into cubes.
2. 5-7 heaping tablespoons Mayonnaise
3. 1 red onion, chopped
4. 1 tsp mustard sauce
5. 1/4 kg carrots, boiled, mashed.
6. Salt and pepper to taste

Instructions:
Throw everything together and mix well.
Refrigerate for a few hours before serving. Poato salad galore.

Sunday, February 6, 2011

Fried Idli

This week I made dosa and idli for Mr. Husband. It was a nice change after having North Indian cuisines cooking in the kitchen for a while. But then there were a ton of idlis left over and I was afraid that he would get bored of eating it the usual way with Sambhar. So then Fried Idli occurred to me. It would be a good packed lunch for him, I thought to myself. And off I was to experiment with this new dish.

I added potato to add interest to the flavours, coriander chutney to give it a twist, lemon juice for the kick, garam masala to add warmth, and veggies to increase the health value of this meal.


Preparation required.

Serves 2 as a meal, 4 for a snack.

1. Mustard seeds, 1 tsp
2. Cumin seeds, 1 tssp
3. Heeng, a pinch
4. Turmeric powder, 2 tsp
5. Garam masala, 1 tsp
6. Red chili powder, 1 tsp,
7. Salt to taste
8. Oil for deep or shallow frying (I chose the latter)
9. Onion, finely chopped
10. Tomato paste, 2-3 tablespoons
11. Coriander chutney, 1 tablespoon
12. Juice of a lemon, 2-3 tablespoons
13. Carrot and peas, 1 cup
14. Ginger, 1/2 inch chopped
15. Garlic, 2 pods, chopped finely.
16. 1 dried red chili, broken into pieces
17. 1 potato, boiled, peeled, cut in cubes
18. Idlis, 5-6, cooled

Instructions:
1. Cut idlis in triangles
2. Heat oil in a wok and shallow fry the idlis. Set aside.
3. Pre-heat another wok and add oil and dried red chili.
4. Add mustard seeds to this other wok and allow it to cracke.
5. Add cumin seeds and when it starts to sizzle, add heeng and turmeric powder.
6. Mix well then add onions, garlic, and ginger. Fry until translucent.
7. Add tomato paste and mix well.
8. Add some water and peas and carrots and boil until all the water disappers.
9. Add some lemon juice, potato, and coriander chutney.
10. Add salt and mix well.
11. Add the idlis.

Serve warm with chilled Raita for lunch or with tea as a snack.

Wednesday, September 29, 2010

Vagharelu Bhaat (Gujju style fried rice)

Hola, everyone! I know it's been a long time since I posted. However, a new motivation to post regularly has struck me.

I was recently married into a Gujju family. My husband's family speak a different language - entirely Greek to me. His food and cuisine is also alien. As a new bride in the family, I am anxious to learn and adjust in the new family. Since my parents-in-law are planning to visit us in the near future, I've decided to take a stunt on Gujju cooking.

I have decided to play it safe and start my way bottom up. I googled Gujarati recipes and stumbled upon Cardamom's gujju dishes and also this site. I realized that Gujju food is more or less a variant of North Indian minus a few exceptions. Gujju dishes are distinct with a bittersweet flavour.

Vagharela bhaat seemed to be the best bet in terms of level of difficulty. Vagherla rice is nothing but Desi Style Fried Rice cooked with both salt and sugar. As much of a struggle it is to pronounce the word 'Vagherla', the cooking part was a piece of cake! It turned out tasty and that's all that matters, right? ;)


Ingredients:
1. Oil
2. Mustard Seeds
3. Heeng
4. Onion, finely chopped
5. Tomato, finely chopped
6. Curry leaves
7. Sugar
8. Salt
9. Turmeric powder
10. Lemon juice
11. Coriander leaves, freshly cut
12. Red chili powder
13. Garlic, chopped
14. Green chili, finely chopped.
15. Cooked, cold white rice.

Instructions:
1. In a non stick pan, heat oil.
2. When the oil is hot, add mustard seeds and curry leaves. Let it splutter
3. Add a pinch of heeng and throw in the onions, garlic, and green chili.
4. Fry until translucent
5. Add turmeric powder, salt, sugar, tomatoes, coriander leaves and rice.
6. mix well.
7. Cook for another few minutes then add lemon juice.

Serve warm with Raita.


I'm so excited about trying my hand over this new cuisine that I ordered my first cook book ever - Tarla Dalal's Complete Gujarati Cookbook! So, Keep reading :)

Tuesday, March 16, 2010

Oven Roasted Potatoes

It's hard to go wrong with potatoes. Baked, roasted, mashed, or fried, skin on or without, potatoes are an all time winner. Having had a few recent fiascoes in the kitchen, I decided to play it safe. Potatoes it will be, I said to myself. And off I went with the baby red potatoes that I had sitting on the counter, waiting to be devoured.
The ubiquitous Oven Roasted Potatoes Drizzled with Olive oil and Sprinkled with Herbs recipe, I knew, was one formula that equaled Sure Shot Success.

Not only are Oven Roasted Potatoes easy to make; they are versatile enough to be served in many forms - a delicious side to any meat or pasta, a snack with Chai, finger food, or just by it's own to nibble away when there is nothing better to do :)

Loaded with zesty herbs and roasted to perfection, the delightful crispy golden outside and soft, spicy inside wreaked a havoc of flavor in the taste department and was fulfilling and satisfying to the appetite. Try it for yourself!

No preparation needed. Serves 2.

Ingredients:

1. Baby red potatoes, washed
2. Salt
3. Red chili flakes
4. Freshly ground black pepper
5. Basil
7. Oregano
8. Olive oil

Instructions:
1. Cut potatoes into wedges and place on an aluminum sheet. Leave the skin on.
2. Drizzle olive oil on the potatoes.
3. Sprinkle basil, oregano, red chili flakes, salt, black pepper.
4. Toss to perfection.
5. Bake for 30 minutes at 400 degrees in an oven.

Potatoes are ready to eat. Serve as a side or as finger food or another item at a BBQ party!

Sunday, March 7, 2010

Beet soup

Isn't it easy to get bored in the mundane routine of life and also tired of the usual home cooked stuff? How often can you go out to try a new cuisine or do you ever have enough dishes on your cooking list to keep a variety indefinitely going?

I am constantly running out of ideas. Stretching out and experimenting with new things keeps me involved. Cooking something I have never before is fun and exciting. It keeps the kitchen as well as the appetite alive.

Last year, I discovered tarot root. This year, I found beet. Beet is one of those vegetables that has never been a part of our groceries. With it's deep blood red color, this vegetable intrigued me. I've been looking around for how I could play with this vegetable. I have found answers through people/blogs - juice, salad, and soup. Beets are loaded with vitamins A, B1, B2, B6 and C. The greens have a higher content of iron compared to spinach. They are also an excellent source of calcium, magnesium, copper, phosphorus, sodium, and iron.

Having had no past experience with beet, I decided to play it safe. I was warned of the hard texture of this veggie and wasn't so sure how it would taste so I decided to boil the beets and puree them into a soup. I am a soup lover.

Adapted from here.

Ingredients:
1. Chicken or Vegetable broth
2. 1 onion, chopped
3. 3 spoons olive oil
4. Salt
5. Pepper
6. Rice vinegar (substitute with rice wine)
7. 1 mashed potato to counter the bitterness of beet.
8. 2 beets, boiled and chopped
9. Few cloves of garlic, peeled and chopped
10. 1 spoon brown sugar (I used jaggery)
11. Green onion for garnishing
12. Sour cream for garnishing
13. Freshly ground black pepper
14. 2 tablespoons tomato paste. This is not necessary but I threw it in just because I love tomatoes!

Instructions:
1. Heat olive oil in a skillet.
2. Saute the onion and garlic in the oil until golden
3. Add the mashed potato, tomato paste, and beet.
4. Cook until tender.
5. Add the broth and bring to a boil. Keep stirring occasionally.
6. Add vinegar, salt, pepper, sugar.
7. Cover and cook on low heat for about 25 minutes. Allow the vegetables to soften.
8. Cool and set aside.
9. In a food processor, blend to a liquid.
10. Heat again
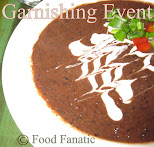
11. Garnish with sour cream and green onion.


Serve hot with garlic bread.

Verdict: Healthy, looks great, but we discovered that beet is not our favorite!

Friday, March 5, 2010

Dhania ki Chutney (Coriander Condiment)

Got a dish but not savory enough? Too bored of the usual main course you have for dinner? Need a kick to a side dish that's inadvertently gone bland? Want to top up your most delectable specialty with a wow factor? Want to add flavor without adding on calories?

Look no more. Coriander Condiment will solve all your problems. Dhania ki chutney peps up any main course, can be used as an accompaniment to any side dish or starter, covers up any culinary disasters and more than makes up for the blandness of a rather boring or healthy meal, accentuates your mastery (dish) without adding on calories, and adds color to bring out the presentation of a meal to make it look more appealing. But beware - this condiment can easily overpower all other food items with it's strong and unique taste. Be prepared for the condiment to take over as the main, and the main course to be devoured as a side! Coriander chutney will definitely be the limelight, when around!

Ingredients:
1. 2-3 bunches of fresh Coriander leaves, washed and thicker stems removed.
2. Lemon juice.
3. 1 fresh green chili.
4. 1/2 Onion.
5. Few pods of garlic.
6. Cumin powder.
7. Salt

Instructions:
1. Blend everything together.

Refrigerate and then serve cold with papadum, pakoda, samosa, chaat (street food), stuffed parantha (Indian bread), or use as a spread on bread. You will either love or hate this condiment. There are no in betweens :)

Happy Holi, everyone!

Search Food Fanatic

Food Fanatic Search Results