Tuesday, March 15, 2011

Dhoodhi Muthiya (Bottle Gourd Steamed Pan Fried Dumplings)

As my reader you must be aware of my obsession with Gujju culture and cuisine. You can find one meal Gujju dishes such as Vagharela Bhaat, Dal Dhokli; snacks like Khaman Dhokla and Lentils like Gujarati Dahl on my blog. This post comes as an addition to the series of the Gujju cookery that I have been upto.

Since one of my readers requested me to post a snack recipe, I thought why not  post a Gujju snack from my very first (purchased) cook book? Muthiya is nothing but steamed dumplings made of vegetables and 3 different kinds of flour mixed with traditional Indian spices. Seasoned with sesame seeds and asafoetida, this dish pampers your palate and satiates your starvation. Muthiya was known to be a popular Gujarati tea time snack but today it has slowly and steadily transcended the borders of western India to make it a dish that everyone embraces. Weight watchers or flavour finders, all  enjoy this dish alike. Take my word for it :)

Ingredients:
1. 2 cups shredded white bottle gourd/pumpkin (dhoodhi/lauki/gheeya), the water strained from the vegetable.
2. 1 cup shredded onion.
3. 2 tsp ginger-chili, shredded.
4. 1 tsp cumin seeds (jeera)
5. 1 tsp fennel seeds (Sauf)
6. 1 tsp turmeric powder
7. Salt to taste
8. 2 tsp sugar
9. 2 cups whole wheat
10. 1 cup besan (chickpea flour)
11. 3/4 cup suji (semolina)
12. .5 tsp baking soda
13. 1 tsp garam masala
14. 6-8 tsp oil.
15. Rai or mustard seeds, 1 tsp
16. Til or sesame seeds, 1 tsp
17. Chopped coriander leaves, 1 cup
18. 1 tsp heeng
19. 2 tsp lemon juice

Instructions:
1. Mix the pumpkin, onion, chickpea flour, semolina, wheat flour, 4 tsp of oil, cumin and fennel seeds, .5 tsp heeng, lemon juice, turmeric powder, salt, sugar, baking soda, garam masala and make a dough with the pumpkin water.
2. Oil your hands and make cylinderical threads of the dough and place on a steamer. Steam on medium heat for 30 mins or until a toothpick comes out clean.
3. Let it cool. Then chop into 1.5 or bite inch pieces. Set aside.
4. In a wok, heat 4-5 tsp oil and add mustard seeds and let it crackle.
5. Add sesame seeds and .5 tsp heeng.
6. Add the chopped bite size pieces of the dumpling and cook until they turn brown.
7 Garnish with freshly chopped coriander leaves.

Serve warm with chilled Dhania ki Chutney


Need more proof that I am no more a rookie in Gujju cooking? :-) You'll get it!

Monday, March 14, 2011

Chocolate Cupcakes


Both Mr. Husband and I are huge fans of Starbucks Chocolate Cupcakes. Paying a hefty price for them along with the calorie intake, however, often holds us back from devouring this heavenly treat.
I decided I would venture into baking cupcakes. For those of you who have been following me from the start must be aware that with trepidation, had I entered the world of baking. It was way back when that I had discovered that baking is not rocket science. But today I baked with greater confidence.
Although Mr. Husband had apprehensions over my baking skills, I managed to get him to come around. He pitched in with the beating and measurements and deserves the credit for the outcome as much as I do.  Delighted with the results, we'd recommend this recipe to any newbie baker. This recipe will drift you away to chocolate paradise.

Ingredients:
  • 1 1/3 cups all-purpose flour
  • 1/4 teaspoon baking soda
  • 2 teaspoons baking powder
  • 3/4 cup unsweetened cocoa powder
  • 1/8 teaspoon salt
  • 3 tablespoons butter, softened or melted
  • 1 1/2 cups white sugar
  • 2 eggs
  • 3/4 teaspoon vanilla extract
  • 1 cup milk
  • Store bought Frosting and Decoration sprinkles (optional)

Directions

  1. Preheat oven to 350 degrees F (175 degrees C). Line a muffin pan with paper or foil liners. Sift together the flour, baking powder, baking soda, cocoa and salt. Set aside.
  2. In a large bowl, cream together the butter and sugar until light and fluffy. Add the eggs one at a time, beating well with each addition, then stir in the vanilla. Add the flour mixture alternately with the milk; beat well. Fill the muffin cups 1/2 full.
  3. Bake for 15 minutes in the preheated oven, or until a toothpick inserted into the cake comes out clean. 
  4. Frost with chocolate favorite frosting when cool.
  5. Sprinkle decoration on top.
Crazy about cakes!

Sunday, March 13, 2011

Khichdi (Rice and Lentil Stew)

Khichdi is sheer comfort food. Easy to digest and packed with  great nutritional value, this dish tastes scrumptious. Khichdi is a smooth mixture of rice and dal, tempered in a flavoured oil. Khichdi is packed with protien as the main ingredient of this dish is lentil. The goodness of turmeric, the crunchiness of mustard and cumin seeds, the hotness of red chili powder, and the kick from our very own heeng, make this dish a simple yet enjoyable delicacy all over India.


Serves 2. No preparation required.

Ingredients:

1. 1 cup of moong dal
2. .5 cup rice.
3. 3-4 cups water
4. 2-3 dried red chili
5. .5 tsp heeng
6. Salt to taste
7. .5 tsp red chili powder.
8. 1 tsp turmeric powder
9. 1 tsp mustard seeds
10. 1 tsp cumin seeds
11. Oil or ghee

Instructions:
1. Wash moong dal and rice.
2. In a cooker, add water, rice, dal, salt, turmeric powder.
3. Allow 3 whistles to blow.
4. When the cooker opens, heat oil in a ladle.
5. Add red chili, mustard powder and heat till the seeds crackle.
6 Add cumin seeds and let it sizzle
7. Add heeng, red chili powder.
8. Add the tempering to the pressure cooker.

Serve warm with yogurt, fresh cut red onion, hot pickes, mashed potatoes (bharta), and papad.

Saturday, March 12, 2011

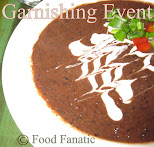
The Return of the Garnishing Event


After the huge success of the Garnishing event hosted by me in a few years ago, I have decided for it's comeback.

I have decided to make this a monthly event. The last date for submitting entries is the 20th of each month. You can send as many posts as you want to this event. However, a maximum of one post per blog per month shall be showcased in the Garnishing series. Archived posts are also allowed as long as it is linked back to this announcement.  
 This event is only open to bloggers.


Guidelines:

  1. Send your best garnished dish. You must send unique posts to this event.
  2. The post should preferably be about the presentation or garnishing of an Indian dish but is not restricted to any cuisine.
  3. You must have a picture of the garnished dish on your post and it must be the picture of your recipe.
  4. Link back to this announcement with the logo above.
  5. Send me an email with your post at food[dot]fanatic[dot]recipes[at]gmail[dot]com. In the subject say Garnishing Event.
  6. Please include the following details:
    1. Your name
    2. Blog name
    3. Post URL
    4. What tips or tricks do you implement to garnish your dishes (some rules you follow, presentation advice, photography clues, etc)
    5. How you garnished it (carving steps, sprinkling ingredients etc)
I'll get the photograph from your post. Looking forward on hearing from all of you.

For extra entries, follow my blog publicly, in a reader, subscribe by email, like the site's facebook page and leave a comment for each entry right here in this post.


Dal Dhokli (Savoury Pita bread immersed in tempered lentil soup)


Dal Dhokli - the name was new to me but the delicacy itself was not. As a kid, my mom would occasionally cook a variant of this dish. Back in the day, we called it Dal Pitta (literal translation is Savory Pita bread immersed in a tempered lentil soup). This dish was never my favorite and so conveniently I made it a point not to learn the recipe. My mantra was that if I don't know how to cook it, I wont have to cook it :) But life often has interesting things in store for us...

As you know, I was married into a Gujju family. The other day we were invited for dinner at Mr. Husband's Gujju friends' place. To my surprise, they served Dal Dhokli for dinner. That is when I discovered that Dal Dhokli/Dal Pitta was an integral part of and typical Gujarati cuisine. Counting backwards, that day it had been some 20 years since I last had Dal Dhokli and to my surprise, I fell in love with it. A nutritious one meal dish, the dhokli's melted in the mouth while the warm lentil stew comforted and wrecked havoc in the taste department . How strange it is that the things you like as a kid are no longer on your most-coveted list as an adult and vice-versa! Such was my case.

Filling and delicious, I decided to give this dish a try. It has the goodness of a tasty protein-rich lentil broth along with the wholesomeness of flavored whole wheat pita bread.

Serves 2. No preparation required.

Ingredients:
1. 1 bay leaf leaves
2. Mustard seeds
3. Green chili, finely sliced
4. Tomato chopped
5. Salt 2 tsp
6. Jaggery 4 tsp
7. Oil
8. Heeng, a pinch
9. Red chili powder
10. 1.5 teaspoon coriander powder
11. Fresh Coriander leaves, chopped
12. Toovar dahl, 1 cup
13. Turmeric powder
14. 3 cups whole wheat
15. 1 cup ajwain or carom seeds
16. 1 tbsp ghee or clarified butter
17. 1 inch cinamon stick
18. 1 tsp methi seeds or fenugreek seeds
19. 1/2 inch ginger, shredded
20. A handful of unsalted peanuts
21. A small ball of tamarind pulp, soaked in warm water

Instructions:
1. In a pressure cooker, add 1 cup toovar dahl, salt, turmeric powder, and 3 cups water. Allow 4 whistles to blow.
2. When the pressure cooker opens, let it cool. Then mash the dahl with an electric blender.
3. In a separate pan, heat ghee for the tempering.
4. When the oil is hot, add bay leaf, Cinnamon stick, mustard and fenugreek seeds and let it crackle.
5. Add a pinch of heeng and then add green chili and ginger. When the green chili fries, add coriander powder, red chili powder.
6. Add this, along with a peanuts, to the dal.
7. Boil the dahl.
8. Add gur  to the dahl. Mix then add tamarind pulp to the dahl.
9. Make a dough of 3 cups whole wheat with 2 tsps oil, salt, .5 tsp red chili powder, .5 tsp turmeric powder, 1 tsp carom seeds, .5 tsp coriander powder.
10. Make small balls of the dough. Then with a rolling pin, flatten the balls. With a pizza cutter, make slices of the flattened ball. Add to the dahl and let it boil.
11. Garnish with freshly chopped coriander leaves.


This recipe is based off Hetal's recipe and customized to my pantry and taste :) Thanks, Hetal!


Walking down the memory lane!

Tuesday, March 8, 2011

Hyderabadi Chicken Biryani

Biryani is my favourite dish. Whenever I go out, I try to order Biryani. I have always yearned to cook Biryani the right away. My several endeavours never met the mark I would have liked. I tried to coax my friend's mom who is from Pakistan to teach me how to cook Biryani but lost the battle :) I wondered what people did that made this dish taste so delicious!

Recently, I got back in touch with one of my college friends who married a sweet guy from Hyderabad. While chatting away with her and catching up, she mentioned she cooks Hyderabadi cuisine. I jumped at the opportunity and urged she give me the recipe for Hyderabadi Chicken Biryani. What could be better? She did!! Thanks, Nidhi. This dish took dinner by storm.  Mr. Husband said it tasted like the ones at the restaurant! This time I hit the right note!


I tweaked the recipe to my taste, convenience, and ready availability of ingredients. Maybe I can call it my recipe based on my friend's. :)

Ingredients:
1. 1 pound chicken breasts, cut into bite size pieces
2. 3 pods of garlic, shredded
3. Ginger, a 2 inch piece, shredded
4. Cinnamon sticks 4
5. Cloves 4-6
6. 1 Bay leaf
7. 4-6 cardamom, whole
8. Salt to taste.
9. Oil
10. Yogurt, 2-3 tablespoons
11. Chicken malasa, 4-6 tsp
12. 1 tsp chili powder
13. Turmeric powder, 1 tsp
14. 1 tsp garam masala
15. 2 onions, thinly sliced.
16. 2 cup rice

Instructions:
1. Cut and wash chicken breast pieces
2. Put chicken in a bowl and add yogurt, turmeric powder, 2-3 tsp chicken masala, salt (I added 1 tbsp) and mix well.
3. Leave it to marinate.
4. Heat a wok and add oil, 2-4 cardamom, 2-4 cloves, 2 pieces of Cinnamon stick, then add onions, garlic, ginger, garam masala, 2-3 tsp chicken masala and fry till the onions turn golden brown.
5. Add the marinated chicken in this and a little bit of water.
6. Boil until the chicken is fully cooked. Stir occasionally.
7. In the meantime, wash rice and place it in a rice cooker. To the rice add water, oil, bay leaf, 2-4 cardamom, 2-4 cloves, 1 tsp salt, 1-2 cinnamon stick. Cook the rice until fully done.
8. Line an oven safe dish with aluminum foil. Add a layer of the cooked rice. Then top it with a layer of cooked chicken, then top it with a layer of rice and so on.
9. Cover the oven safe dish with aluminum foil
10. Cook in the oven at 350 deg c for 5 mins.
11. Mix the rice and then cook for 5 more mins in the oven at the same temp.


Serve warm with Raita and Salad


Friday, March 4, 2011

Pao Bhaji

Pao Bhaji is Indian street food. Pao Bhaji is a potato/tomato based curry that is often eaten as a snack in western India. Pao means bun and Bhaji means vegetables.


It's Mr. Husband's favorite. Pao bhaji is relatively easy to cook and tastes delectable!

You certainly won't regret this one :)

Let's get cooking...


Ingredients:
1. 2-3 tablespoons of ghee
2. 4 potatoes boiled, peeled, mashed.
3. 1/2 small cauliflower boiled, mashed.
4. 1 cup green peas
5. 2 tablespoons tomato paste
6. 1/2 onion chopped
7. 1 thai chili, chopped (optional)
8. 4-5 tsp pao bhaji masala
9. Salt to taste
10. Carrots and green beans (optional), boiled and mashed

Instructions:
1. In a pressure cooker, add potatoes and cauliflower and allow it to boil. 5 whistles should do it. Mash the vegetables coarsely.
2. Heat ghee in a wok and when hot add chili and onion.
3. Saute until translucent.
4. Add tomato paste and mix well.
5. Add pao bhaji masala and cook on high heat until the paste leaves the ghee.
6. Turn the flame down to medium and add the mashed vegetables. Mix well and cook for another 5-10mins
7. Add Salt and peas.
8. Cook for another 5 mins and mix well.

Garnish with freshly chopped coriander leaves and serve warm with pita bread, roti/parantha, or bread/buns.

Potato Salad

Potato salad is a side dish, served cold, that is a winner at summer barbecue parties, potlucks, picnics, pool parties, or any party where the grub table is full of snacks or finger food. The good thing about Potato salad is that it's easy to prepare, takes minimal time and ingredients, is rather low cost, does not need warming before serving it, and sits well with most people - vegetarian or not.

Next time you're invited to a party, consider taking this for your hosts and then sit back and enjoy the praise :)

Ingredients:
1. 4 Potatoes boiled, peeled, cut into cubes.
2. 5-7 heaping tablespoons Mayonnaise
3. 1 red onion, chopped
4. 1 tsp mustard sauce
5. 1/4 kg carrots, boiled, mashed.
6. Salt and pepper to taste

Instructions:
Throw everything together and mix well.
Refrigerate for a few hours before serving. Poato salad galore.

Search Food Fanatic

Food Fanatic Search Results